


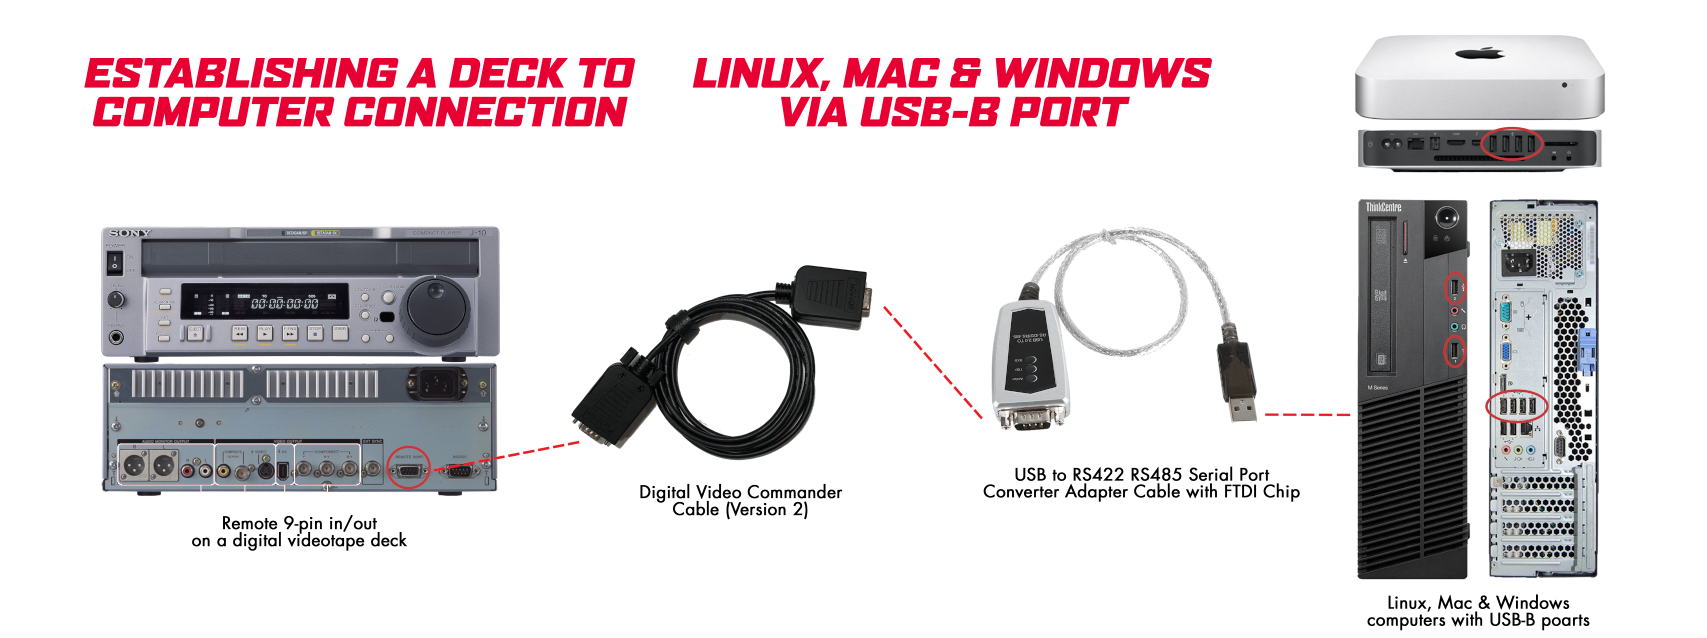
Step 1: Test the cable to make sure the cable works by establishing a connection between a deck and a computer using the diagram below. If your computer does not have a USB port, and adapter such as for USB-C will be necessary. (Click for full size).
Step 2: Install the most recent release for your system from sony9pin CLI. (Note: not all snapshots contain builds for all systems - you might have to check a couple to find yours). After installing, confirm installation by running “sony9pin” in the terminal.
Step 3: Identify the name of your port that is being used by the cable adapter from the list produced. To help with this you might try running sony9pin -h and then looking for “cu.usbserial-AB0L8UIT”.
Step 4: Make sure your deck is set to remote mode and test to see if your deck responds to the DVC cable by running test commands in the following format: sony9pin [PORT NUMBER] [option].
For example, to issue a play command to a deck connected through port 10, you would use: sony9pin 10 p.
The full list of available commands is:
-h: help-v: verbose mode
The full list of available options is:
-: interactive (1-char command then enter)e: ejectf: fast forwardp: playr: rewinds: stop0: status1: type2: timer13: timer24: ltc_tc_ub5: vltc_tc_ub