Equipment
To set up a DV transfer station, you’ll need the following items:
- Computer:
- Mac: the following computers and operating systems are compatible with DVRescue.
- Models: MacMini (2014 and up), M1, M2
- macOS: Big Sur, Monterey, Ventura, Sonoma 14, Sequoia
- Please note: computers running macOS Mojave 10.14.6 and below do not seem to be compatible with DVRescue.
- Windows/Linux: this section of the documentation is under development and will be updated once the Windows/Linux version of the tools have been fully established.
- Note that in order to capture dv, you will need a dual boot of Windows/Ubuntu. Capture is not currently supported in the GUI, but with a dual boot should be functional in both the dvrescue command line interface and through dvcapture in vrecord.
- Please see our development update videos and GitHub issues (search for “Windows” or “Linux” to filter for relevant issues) for more information.
- Please see the Windows/Linux set-up guide for specifics of building a transfer station suitable to that environment.
- Mac: the following computers and operating systems are compatible with DVRescue.
- DV Device: A DV deck, player or camcorder with a functioning Firewire connection. You’ll need to ensure that the device you are using is compatible with the DV format you are working with. For more information on DV videotape formats and various models of videotape recorders, please see the format and deck guides on our website. If you would like to add any tips or tricks to either guide, please post an issue on the DVRescue GitHub page.
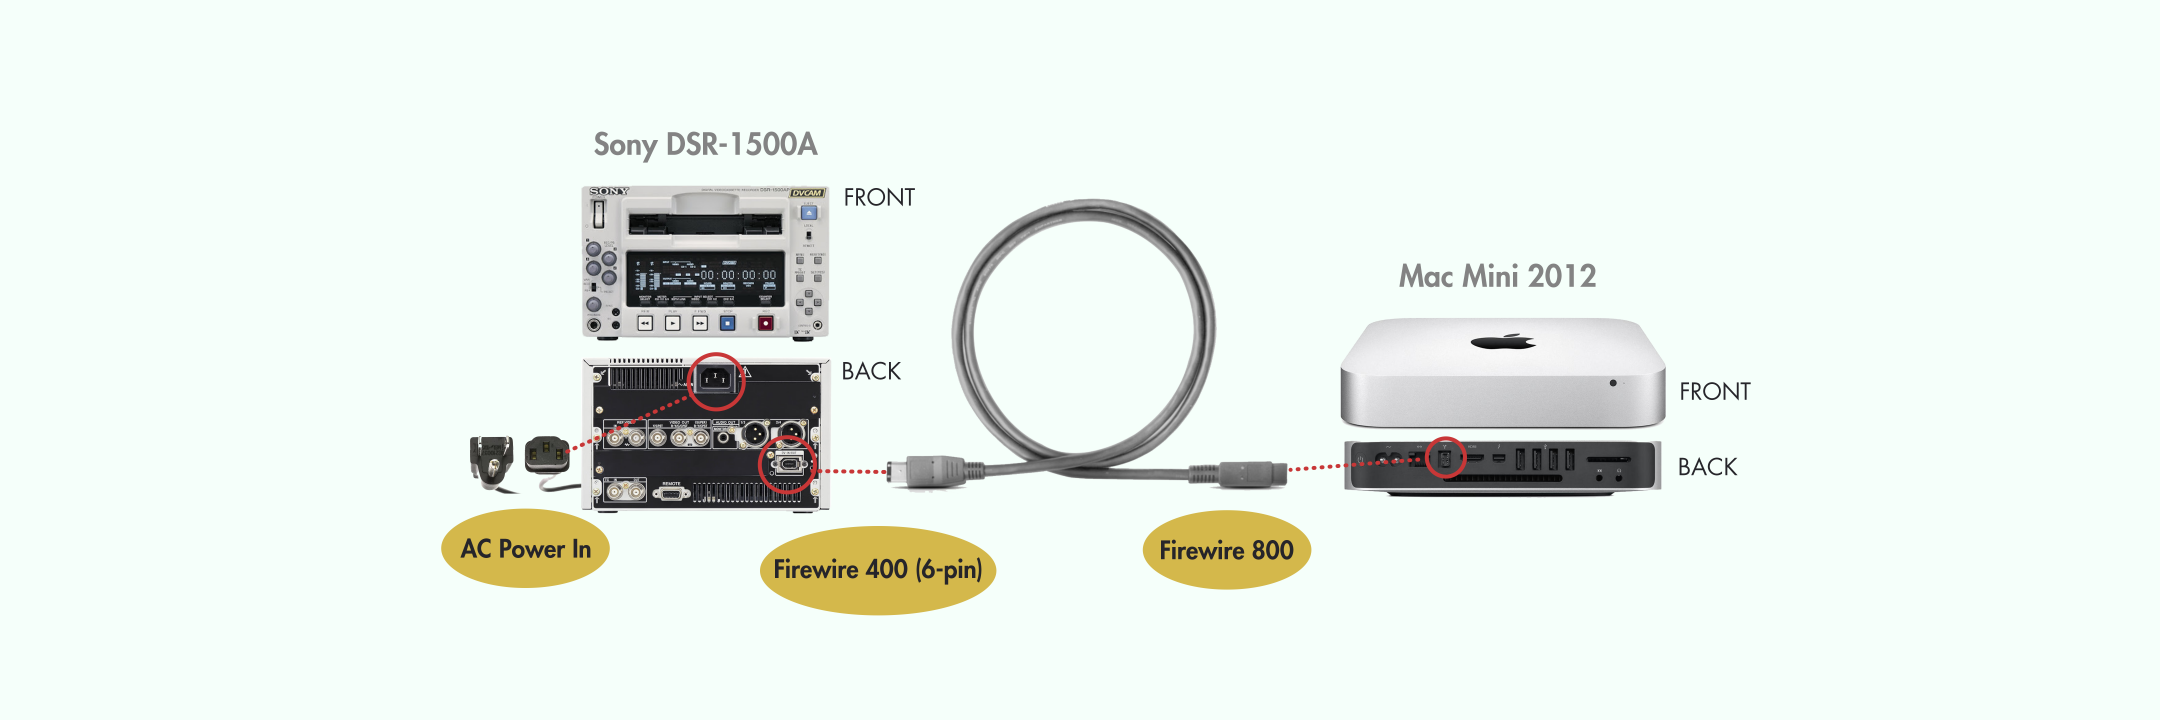
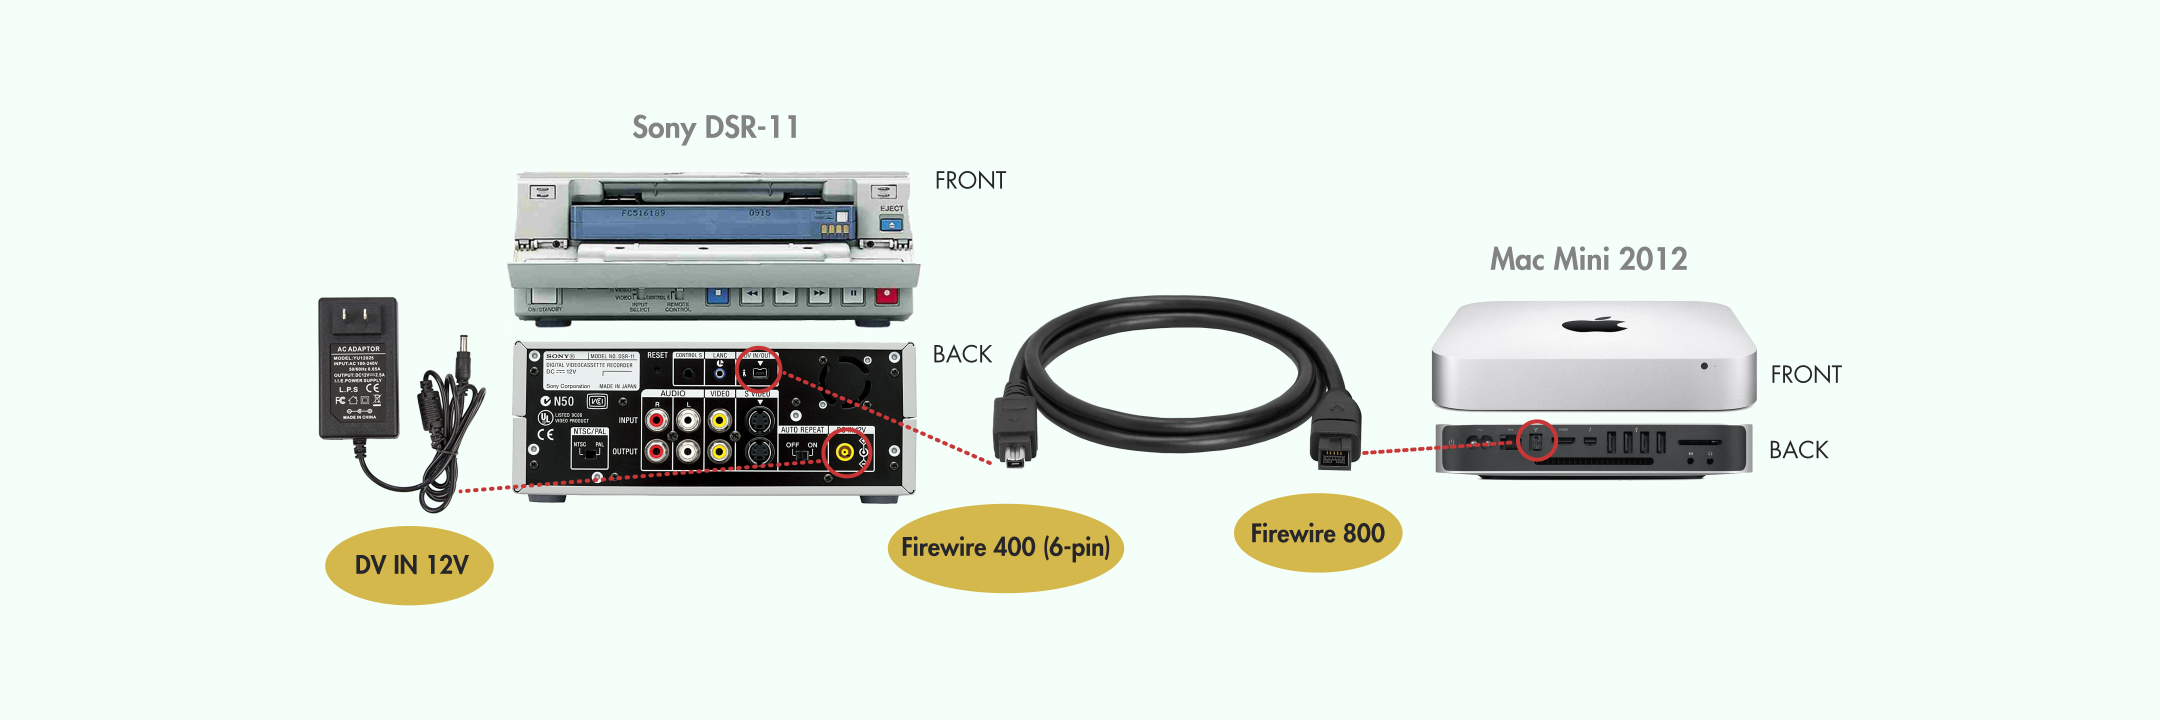
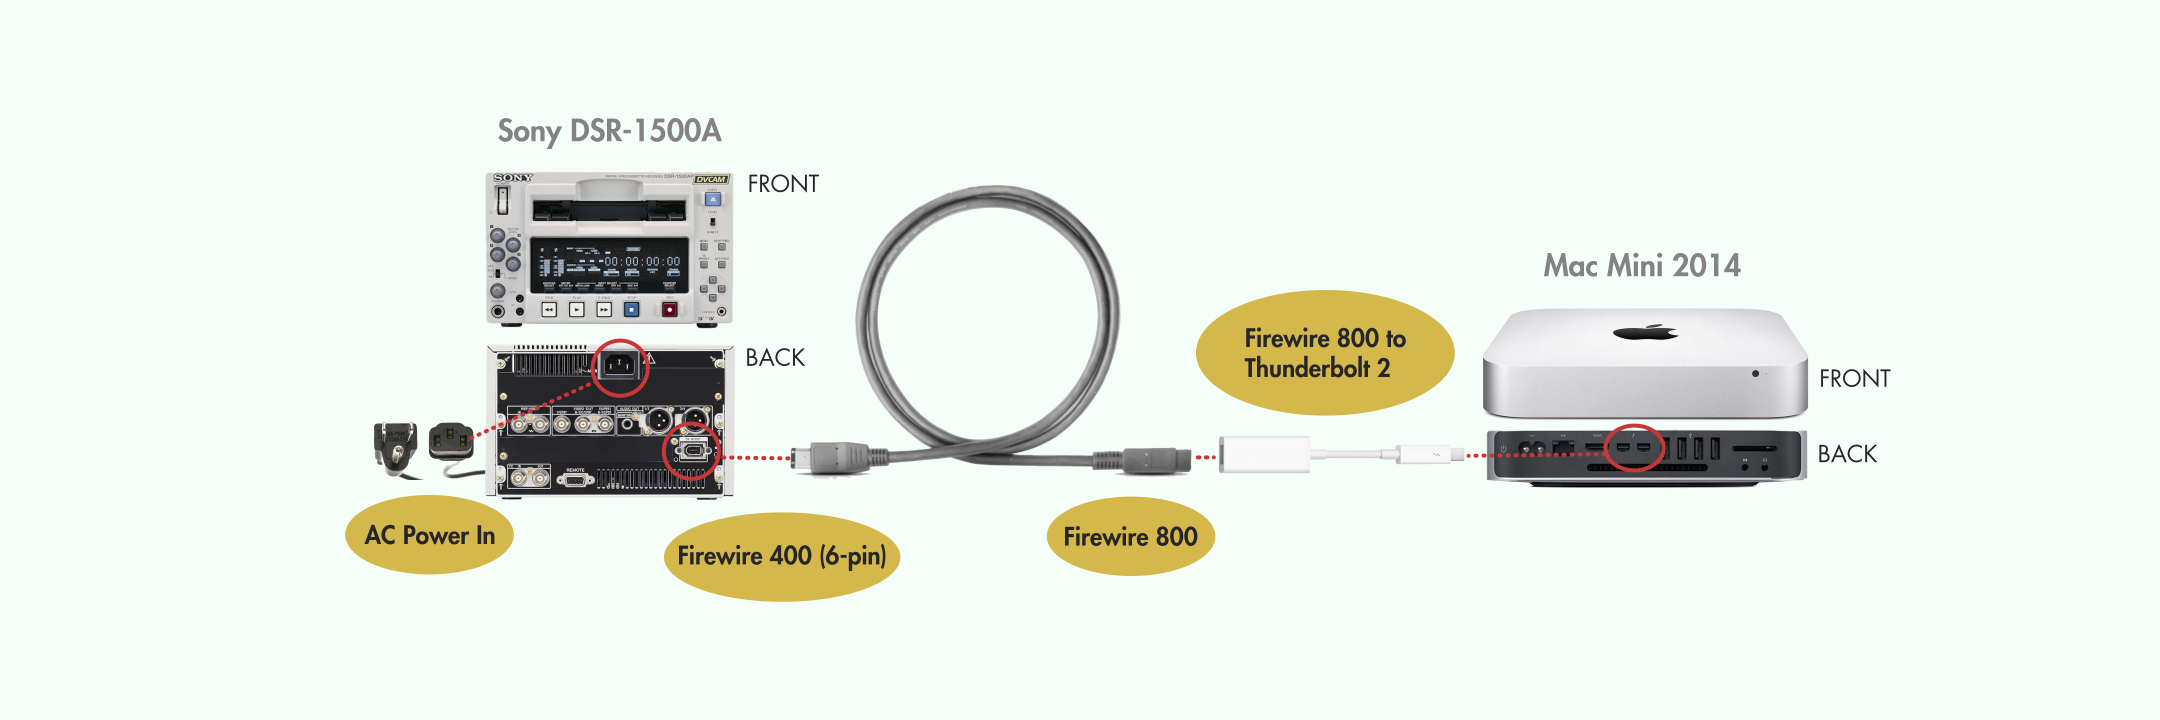
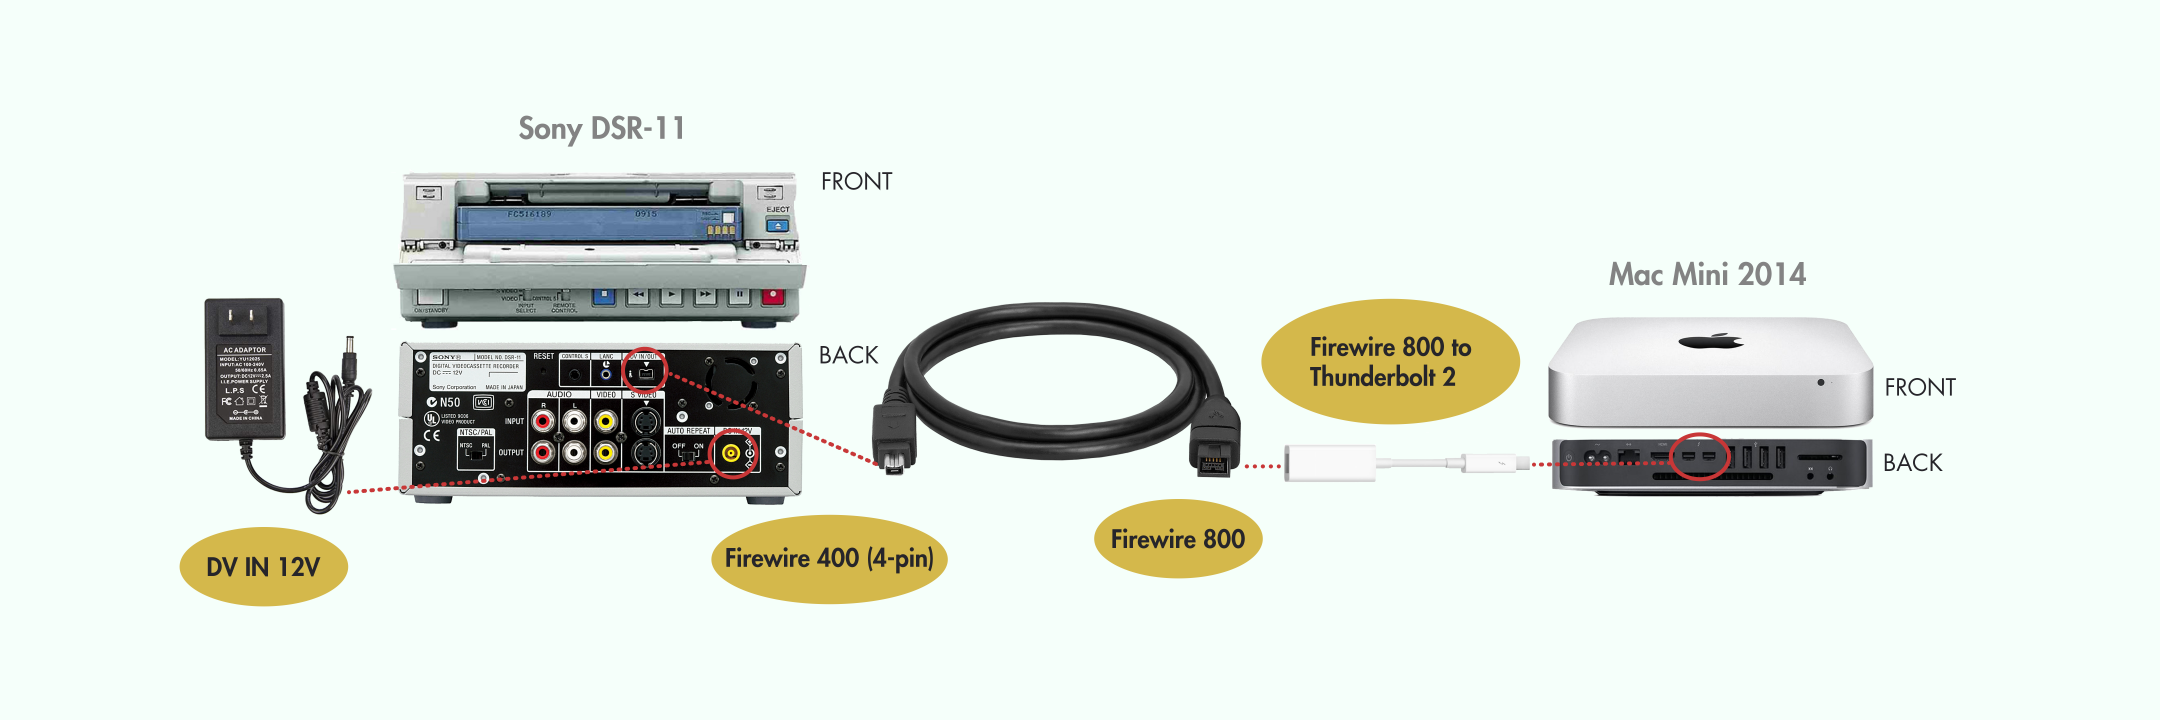
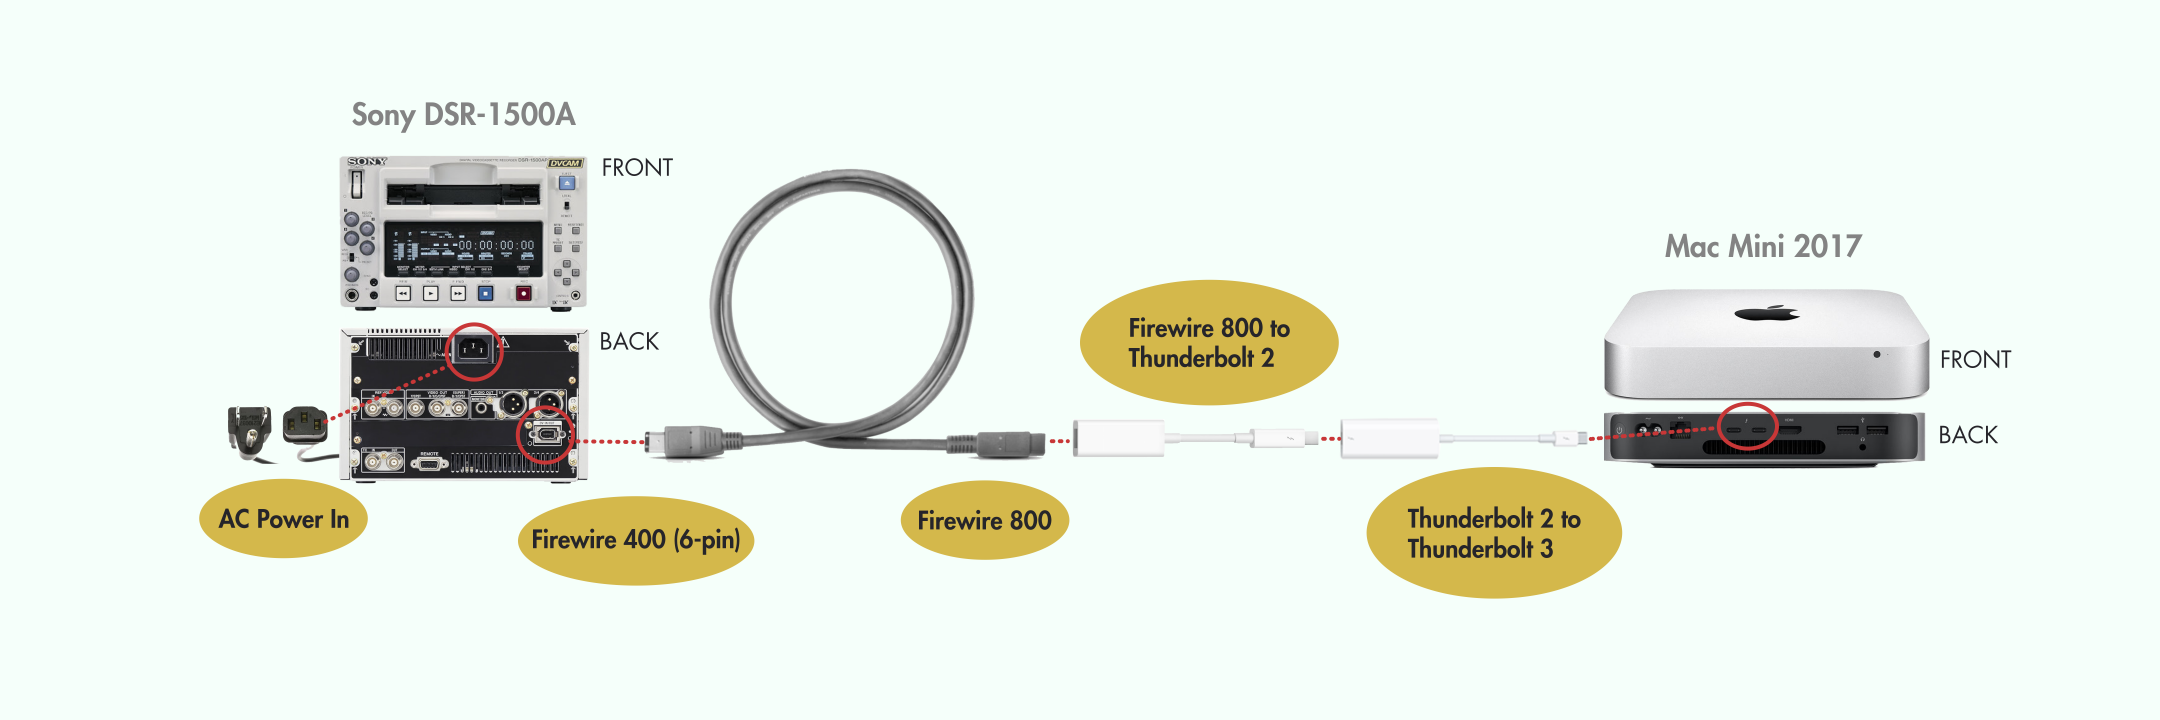
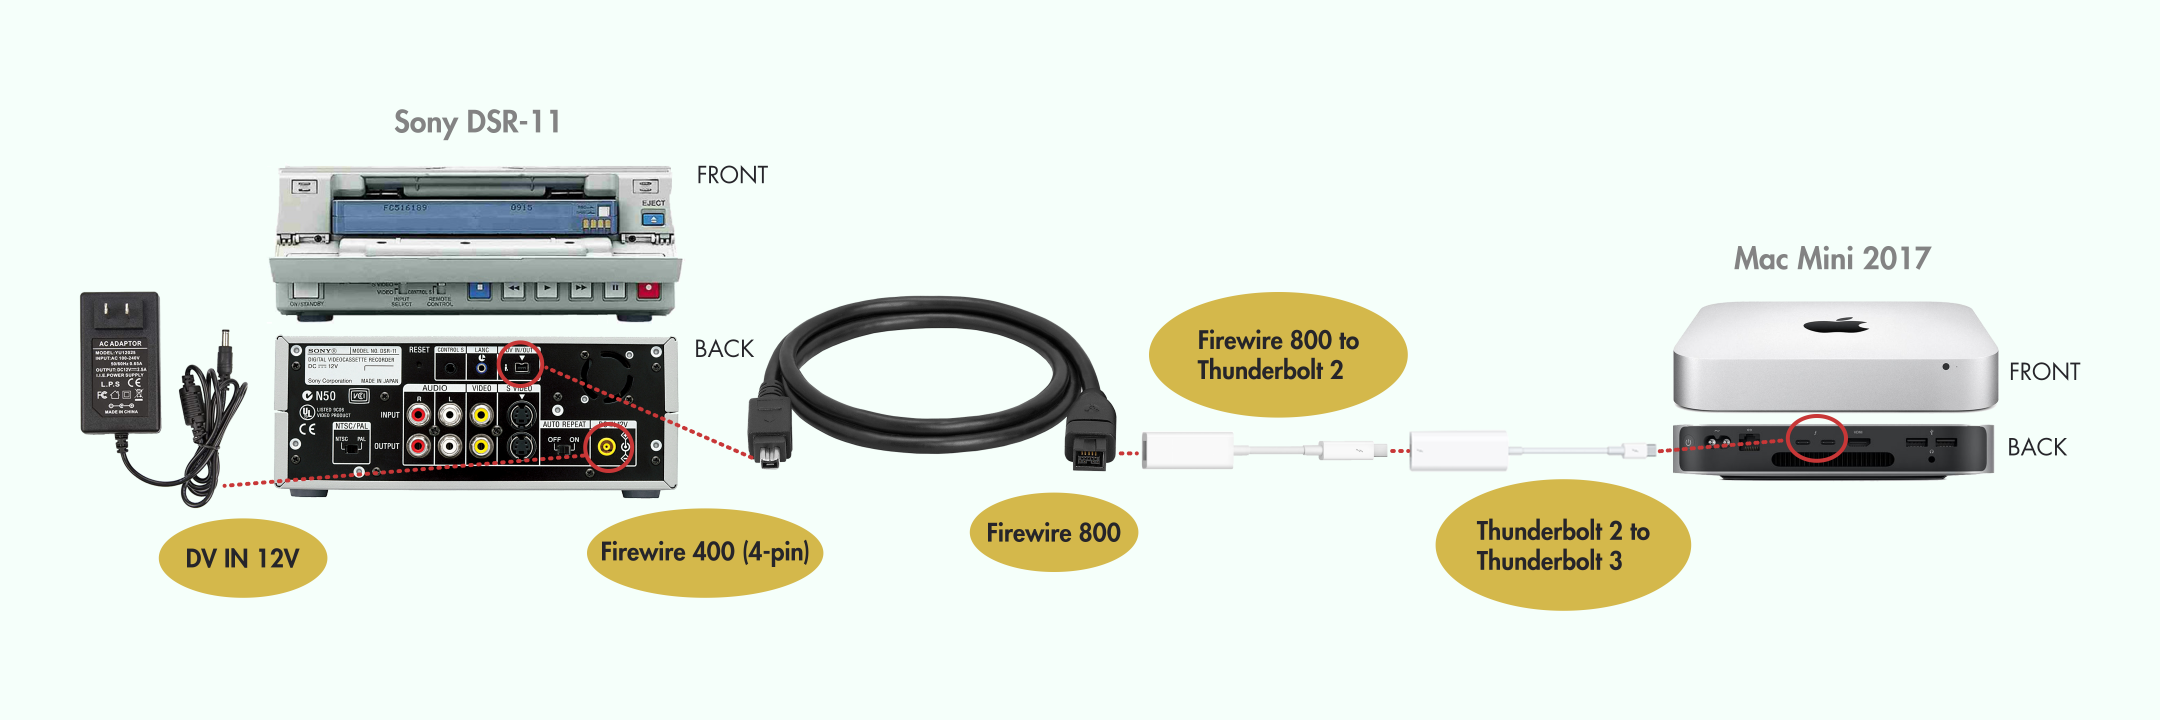
- Firewire Cable: A Firewire cable with the proper inputs and output for the specific deck you and computer you’re using. Please see Step 1 below for more information.
- Adapters (Mac only): Depending on the model of your computer and the data ports included, you might need some adapters to complete the connection. Please see Step 1 below for more information.
- We’ve had the best luck with Apple adapters, but others work as well, they just tend to not last as long. Make sure that you confirm that the adapter is for data (and not just display), using the same guidelines as for the cable.
- Please note: for a PC/Linux set-up, you will need to have a DV card installed and your Firewire cable must be connected directly from your device to your computer (the PC/Linux software doesn’t play well with adapters).
Establishing deck to computer connection
- FireWire Connection: In order to connect your DV deck to your computer for data transfer (capturing DV videotape formats), you will need to establish a FireWire connection between the two. To determine which cable you need, you will need to identify the DV output (typically located on the back of the deck/player/camcorder) and the data compatible FireWire or Thunderbolt input on your computer. Adapters may be needed as well depending on the model/generation of computer you are using.
- Cable Selection: Using the <a href=”“/dvrescue/sections/dvcables.html” target=”blank”>Cable Guide</a>, determine the types of cables, adapters and power supply needed to connect your specific deck to the generation of Mac you are using. Ensure that any Thunderbolt cables are compatible with data transfer (vs. for display only). See note below for more details.
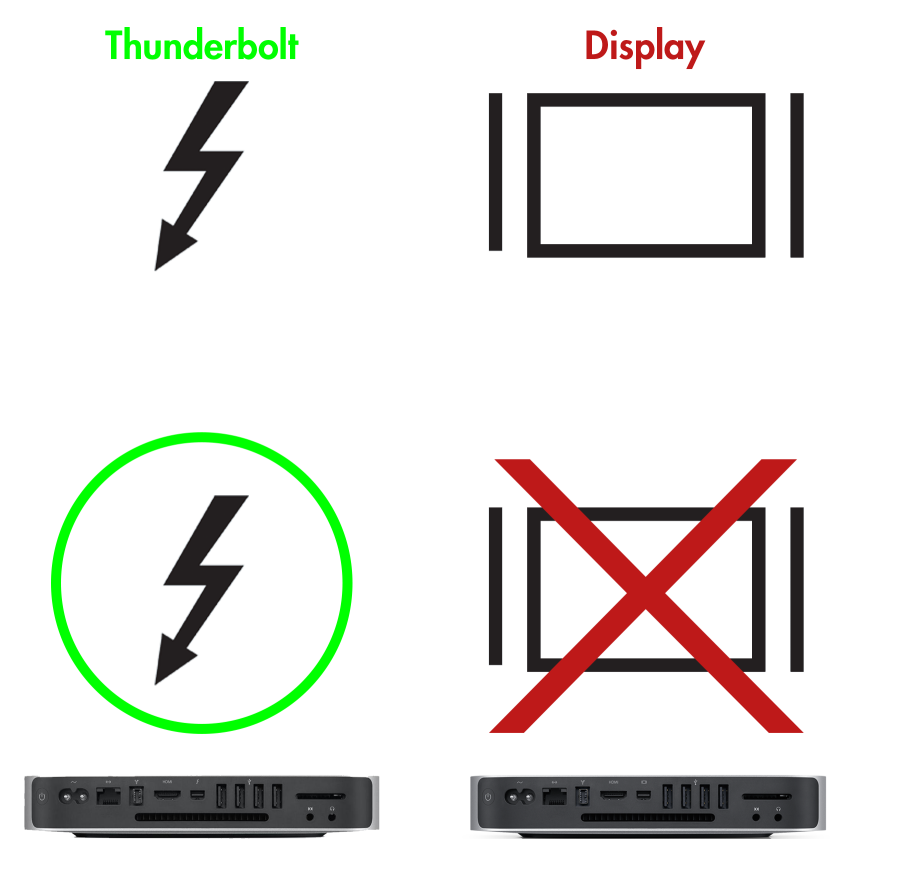
- Display vs. Data Transfer: For Thunderbolt 2 and Thunderbolt 3, you need to ensure that the ports, cables, and adapters/dongles you are using all have the Thunderbolt symbol (vs. a display symbol) to ensure they are capable of transferring data from the DV deck to your computer. Otherwise, the deck will not show up in vrecord or DVRescue. While the connections look the same and will fit each other, they are not designed to operate the same way.
- Pro Tip: If you have two ports that look like Thunderbolt ports on your computer, use the one closest to the front. On some generations of Macs the other port is actually a MiniDisplay port for video output. They look the same but use different cables. DVRescue and vecord won’t recognize the player if it’s connected to the wrong port.
- Cable Selection: Using the <a href=”“/dvrescue/sections/dvcables.html” target=”blank”>Cable Guide</a>, determine the types of cables, adapters and power supply needed to connect your specific deck to the generation of Mac you are using. Ensure that any Thunderbolt cables are compatible with data transfer (vs. for display only). See note below for more details.
- Plug your deck/player/camcorder into its power supply and into a power outlet. Make sure that the cables are inserted all the way into the output port on the back of the deck.
- Connect your deck to the computer using the required cable (and adapters if needed). For details, see the images below for various ways to set-up the connection based on the input ports available on your Mac or PC and the DV IN/OUT on the deck you are using.
- Make sure that the cables are inserted all the way into the Mac computer port and that any adapters used are securely connected.
- Turn on your deck/player/camcorder.
- Review the manual for your deck and make sure the output settings on your deck/player/camcorder are correct. Manuals are available as part of our Deck Guide. Notes are also available for unique characteristics, tips and tricks.
- Check your connection is successful by opening the DVRescue GUI and clicking on the “Capture” tab.
- If a deck/player/camcorder is connected, the window should have a player display and the name of the deck should be listed at the top. Unless a tape is playing, the player will display a “No Signal” message. See list of shorthand names for each device in the Deck Guide.
- If you have more than one deck/player/camcorder connected, there should be a player displayed for each deck successfully connected.
- If the device you would like to use is not properly connected, there will be a message that says “No DV Deck Detected”. To resolve this, refer to the Troubleshooting page.


